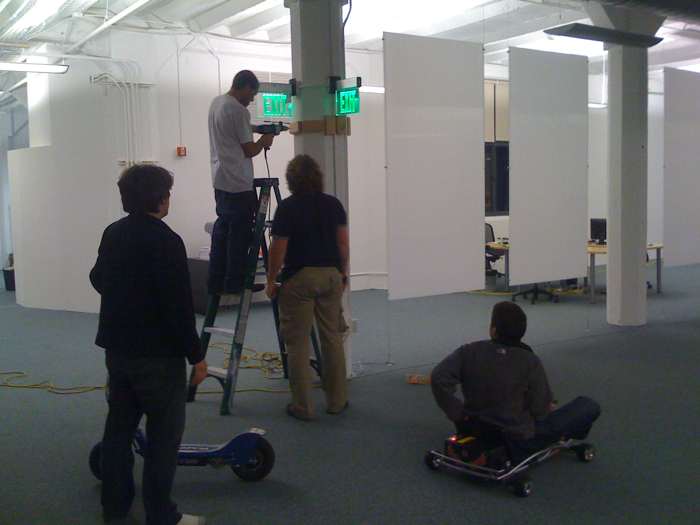
Scribd built a zip line! Chris Seifert and I, along with our coworkers’ help, built a zip line over 3 nights at Scribd. Which is why I haven’t been posting more.
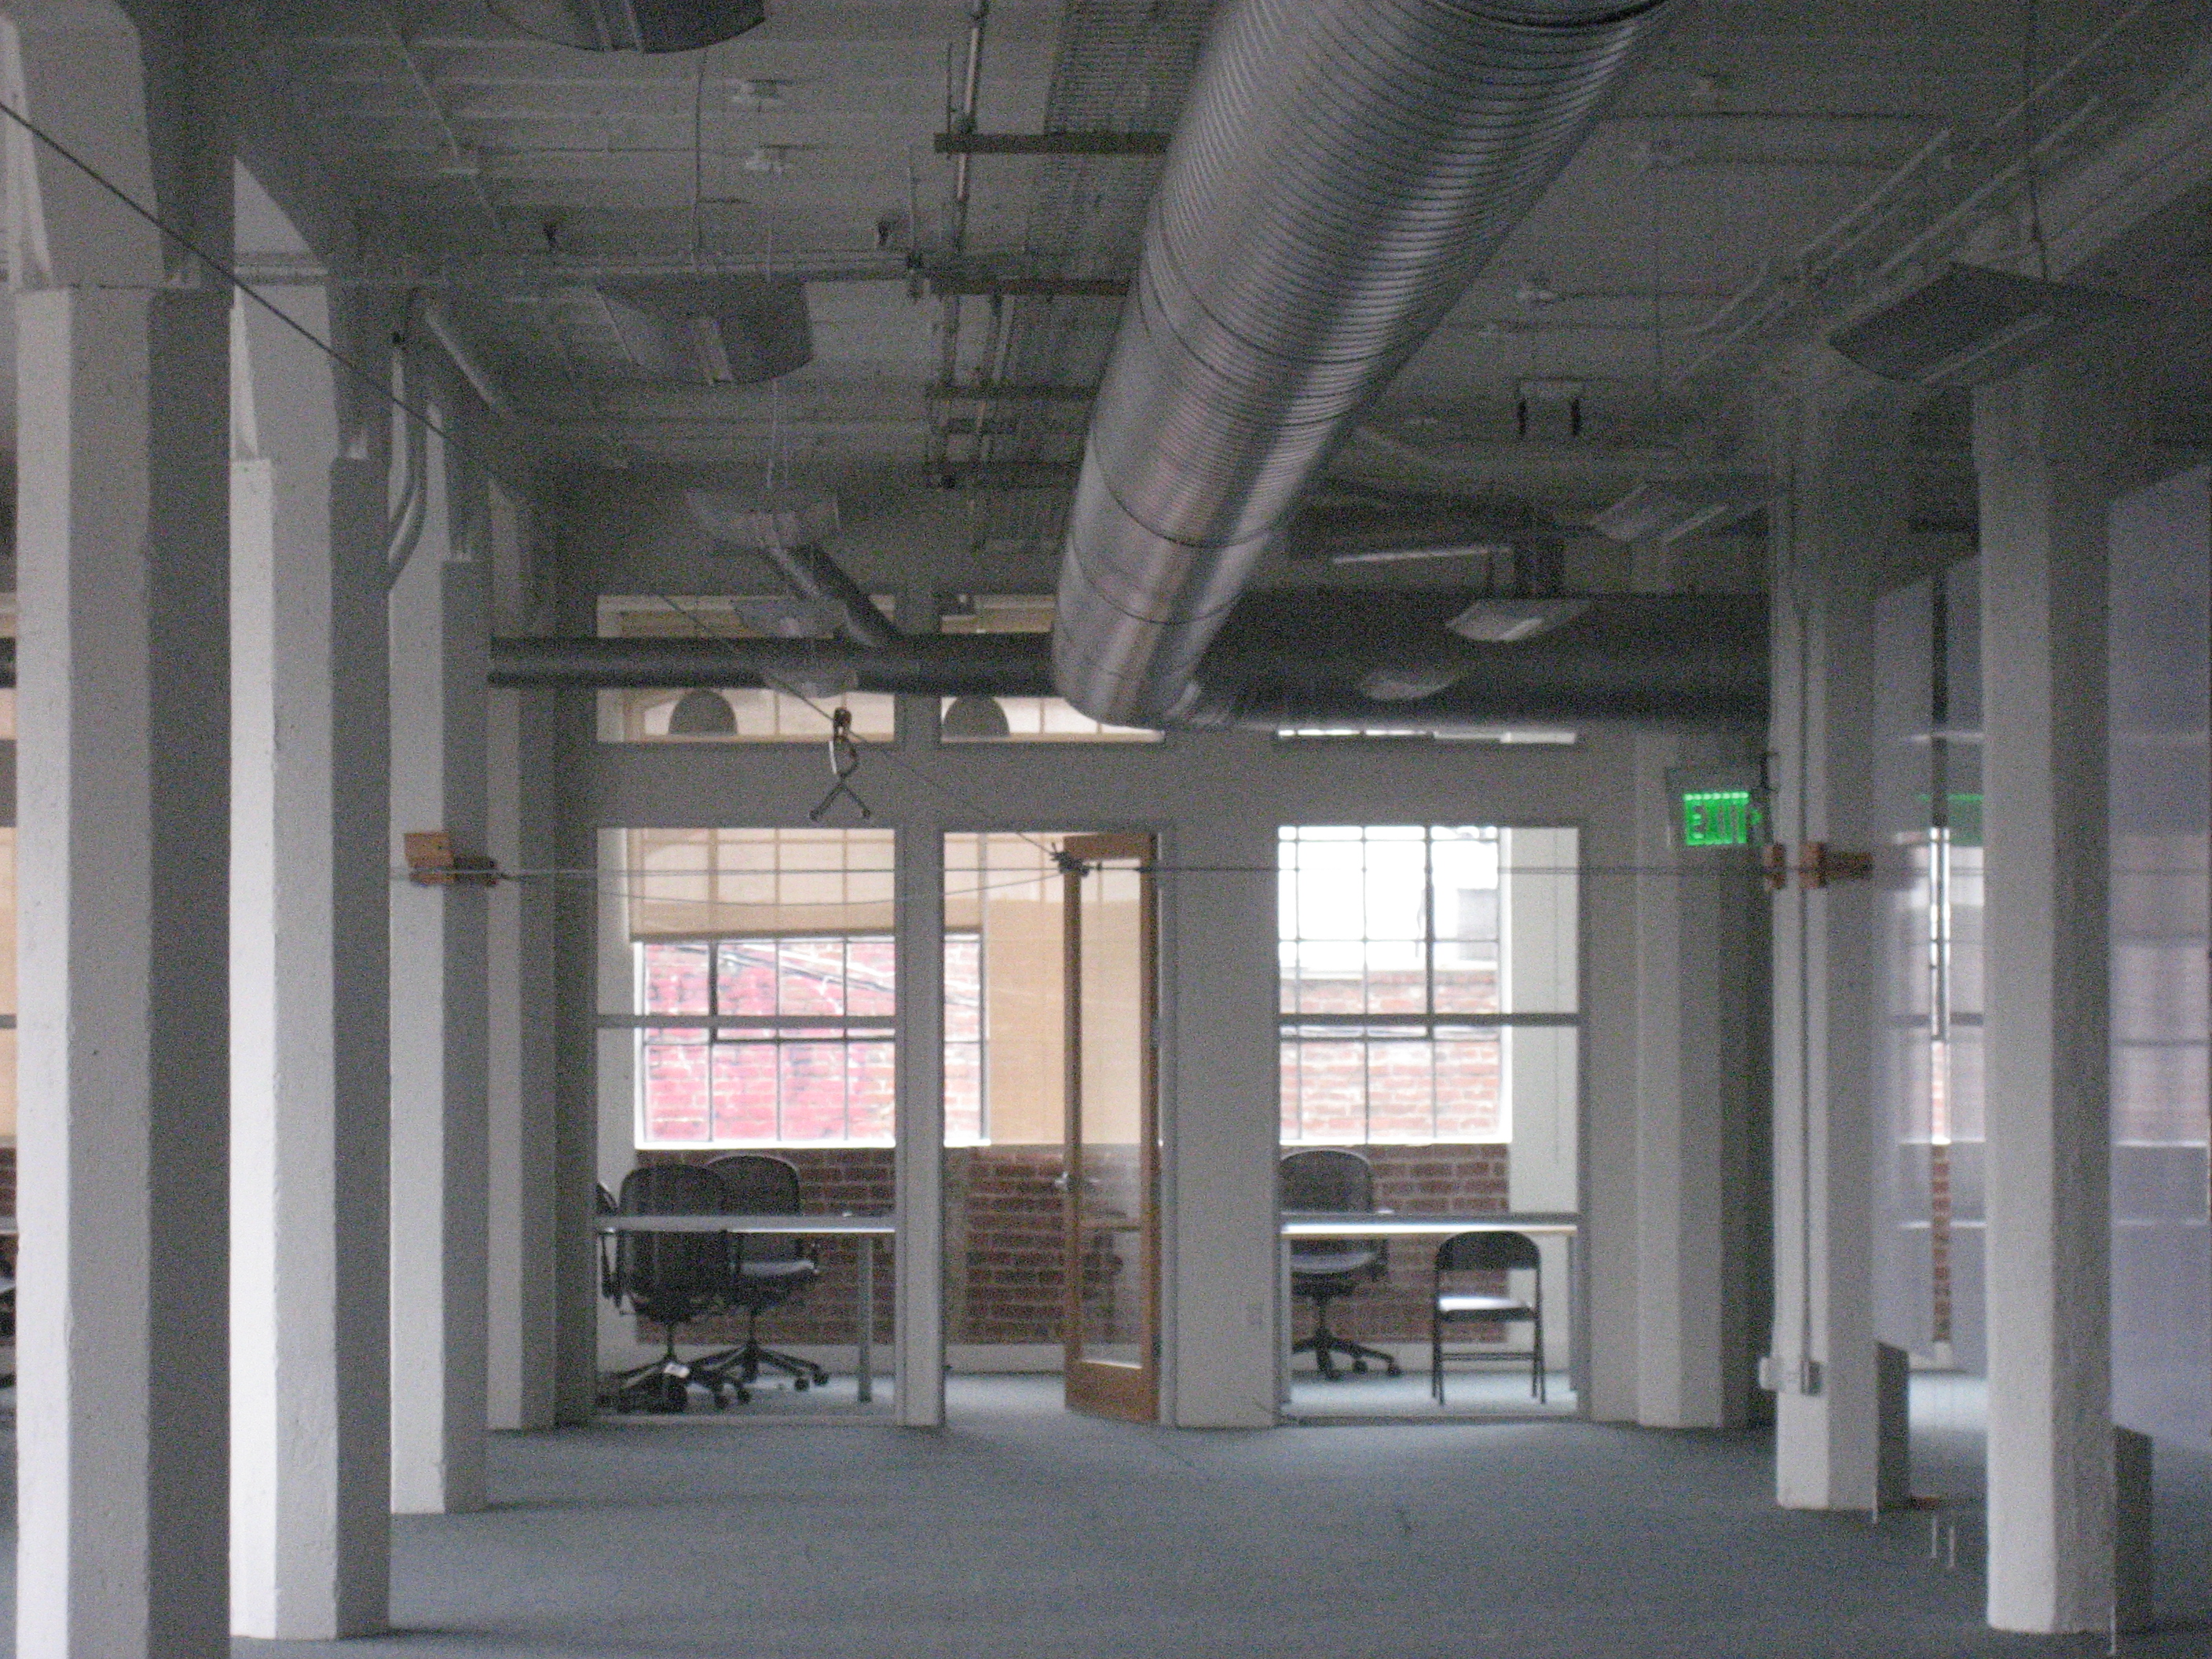
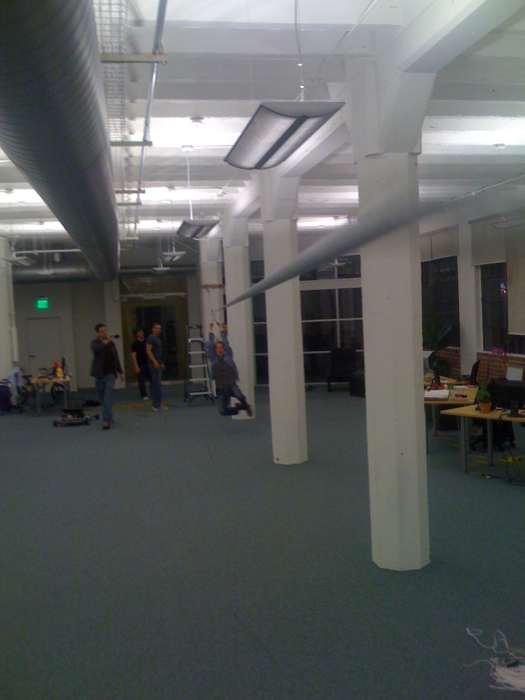
Scribd has a long office space, with 6 pairs of 8-sided concrete columns running down the middle. Chris and I decided to build the zip line starting near the entrance from a single column, terminating in a Y arrangement between two columns. We had debated running the zip line across the long diagonal of the rectangle formed by the columns, but concluded that it would be better if people weren’t aimed dead at a concrete column.

The first night, we glued 6 inch pieces of two-by-four on all sides of the columns. The idea was that we would screw these two-by-fours into the concrete with the masonry screws, and allow the cable to sink into the wood instead of the concrete which would crumble. Chris and I discussed using either a router or a dado to cut a channel into the wood for the cables, but this turned out to be unnecessary – the cable sunk itself into the wood. Still, zip line v2.0 will probably have routes cut for the cables.

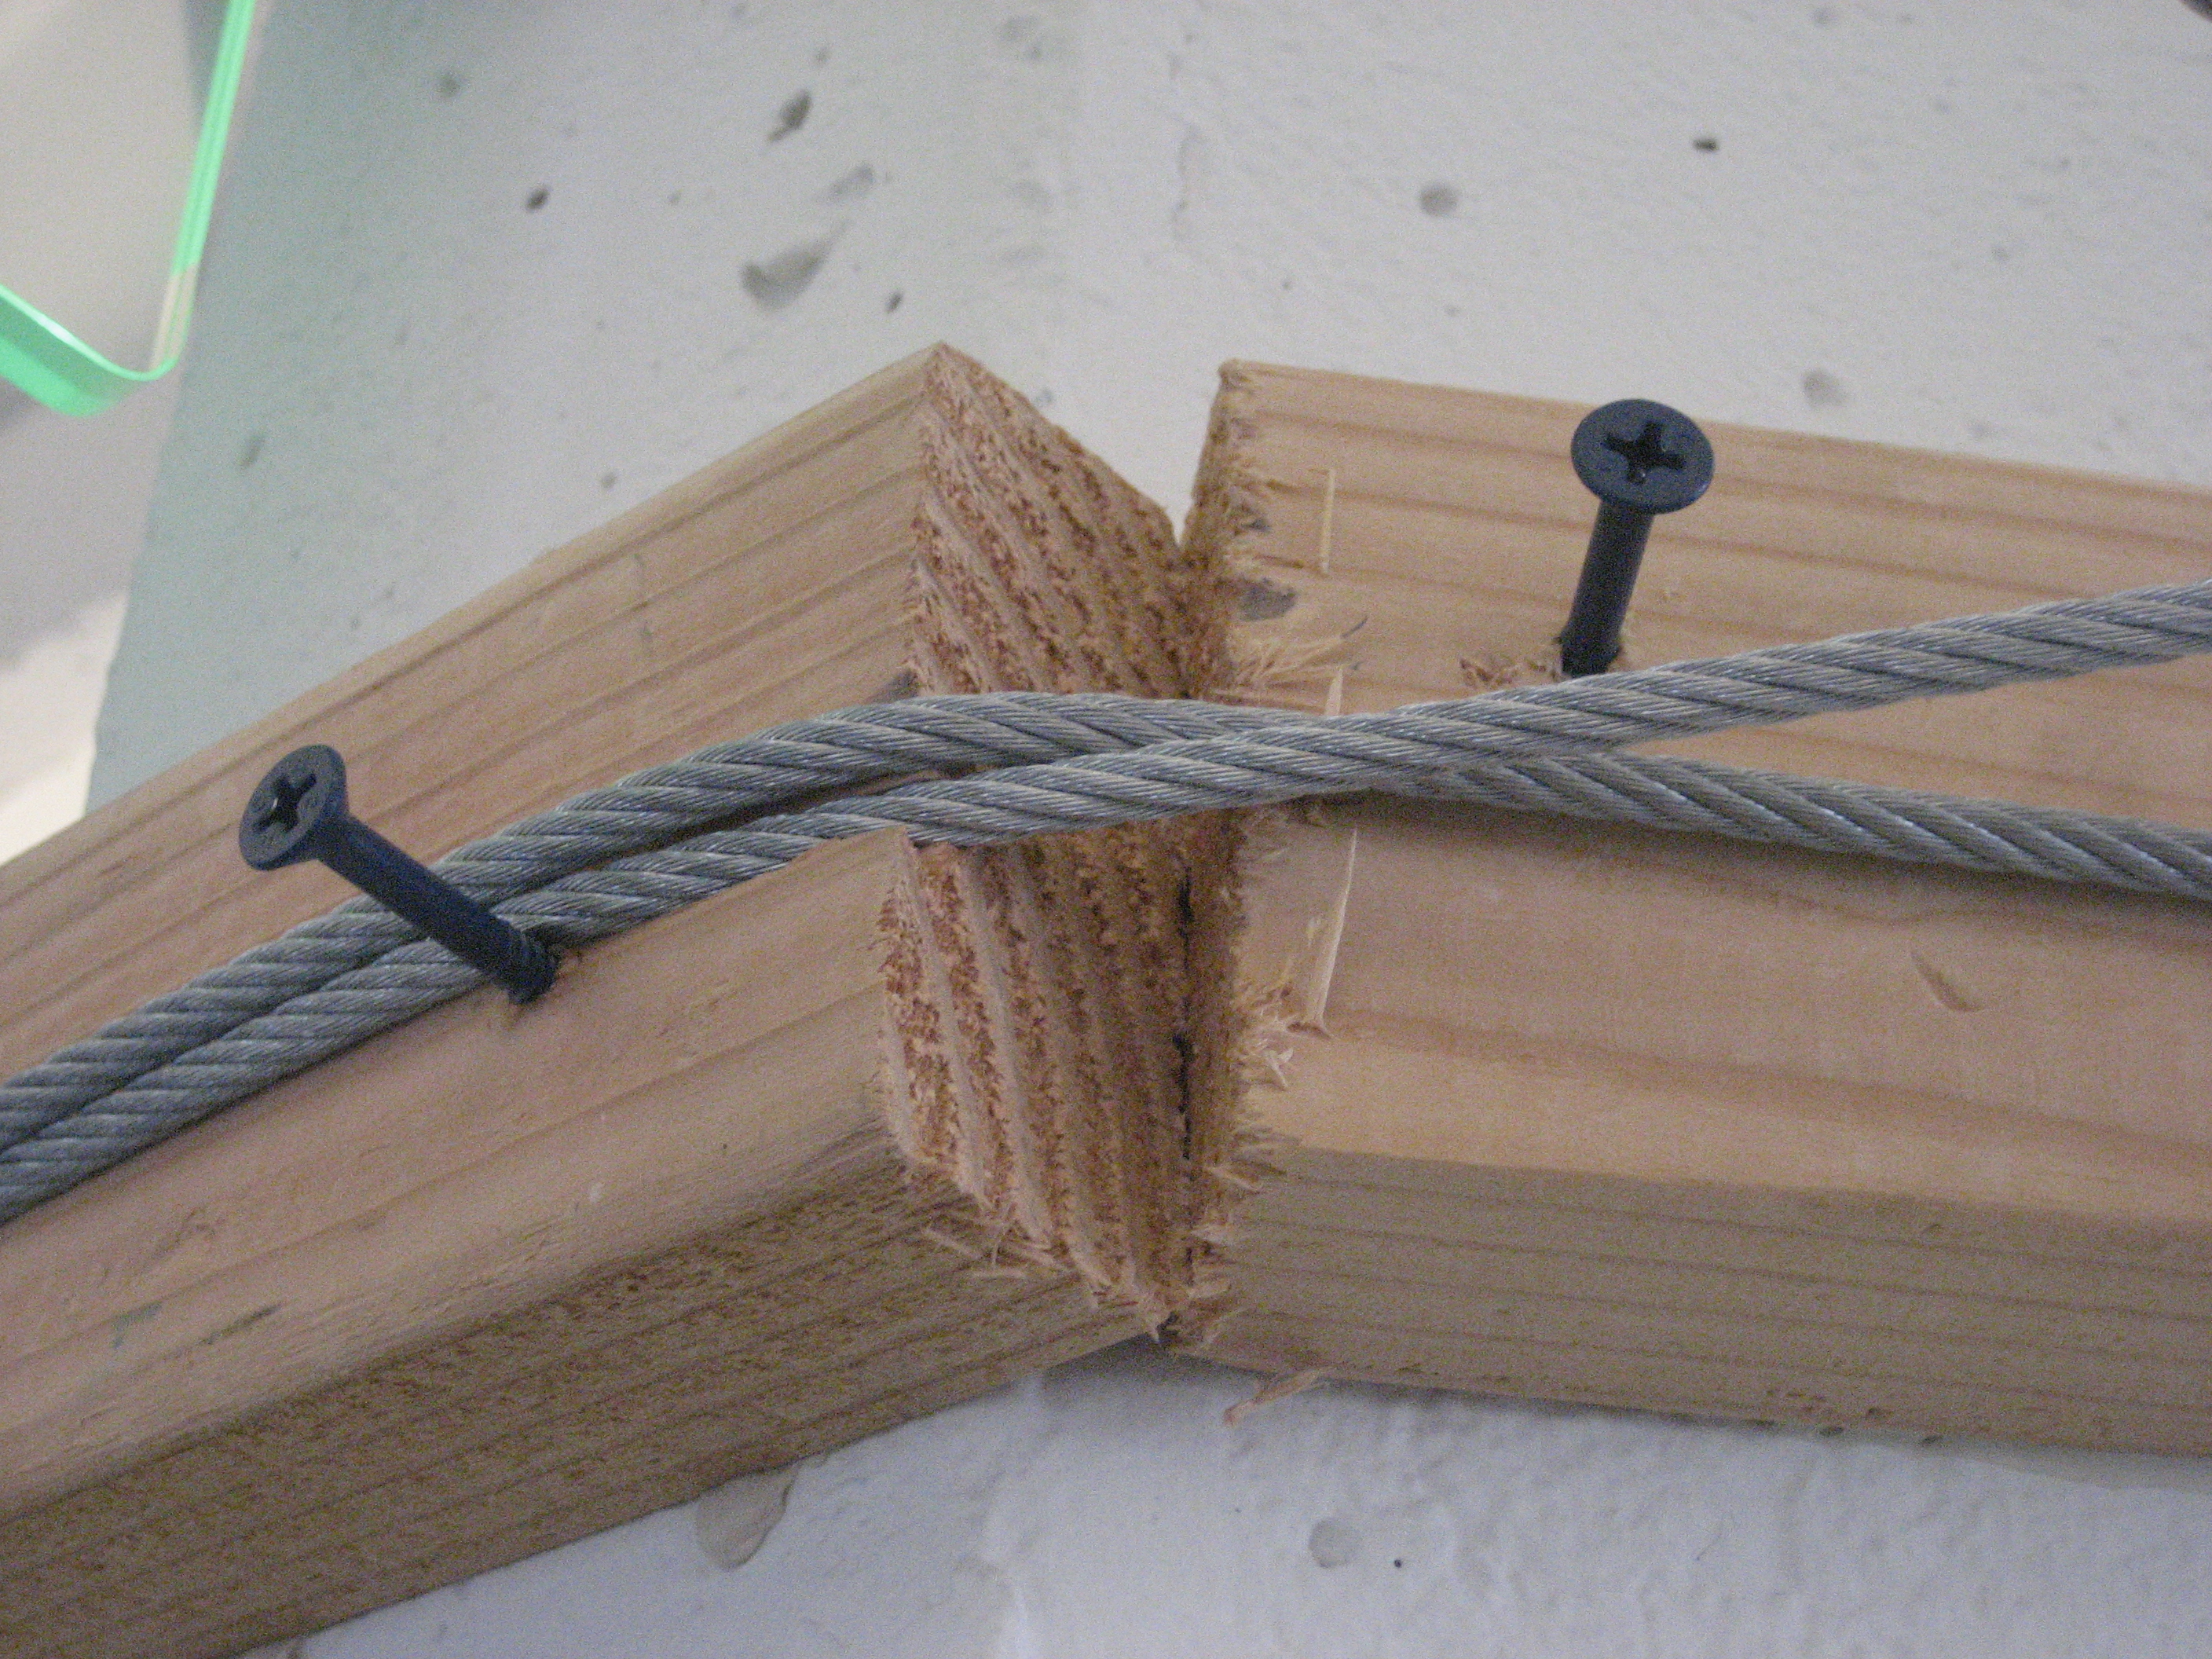
The second night, we went around the two by fours and put two screws in, one above where we wanted the cable to go and one below. At the last minute, per managements’ request, we didn’t sink the screws into the concrete but just left them sticking out of the wood. I was worried that the wood would slip, but Chris was sure that the cable would be tight enough that it wouldn’t. In retrospect, Chris was right, and we ended up having to move the wood higher on the starting column so it was a real win to not bolt them in. Nonetheless, the screws were crucial for holding the cables in place while we were actually putting the cable up before all the pieces were connected and held up under tension.
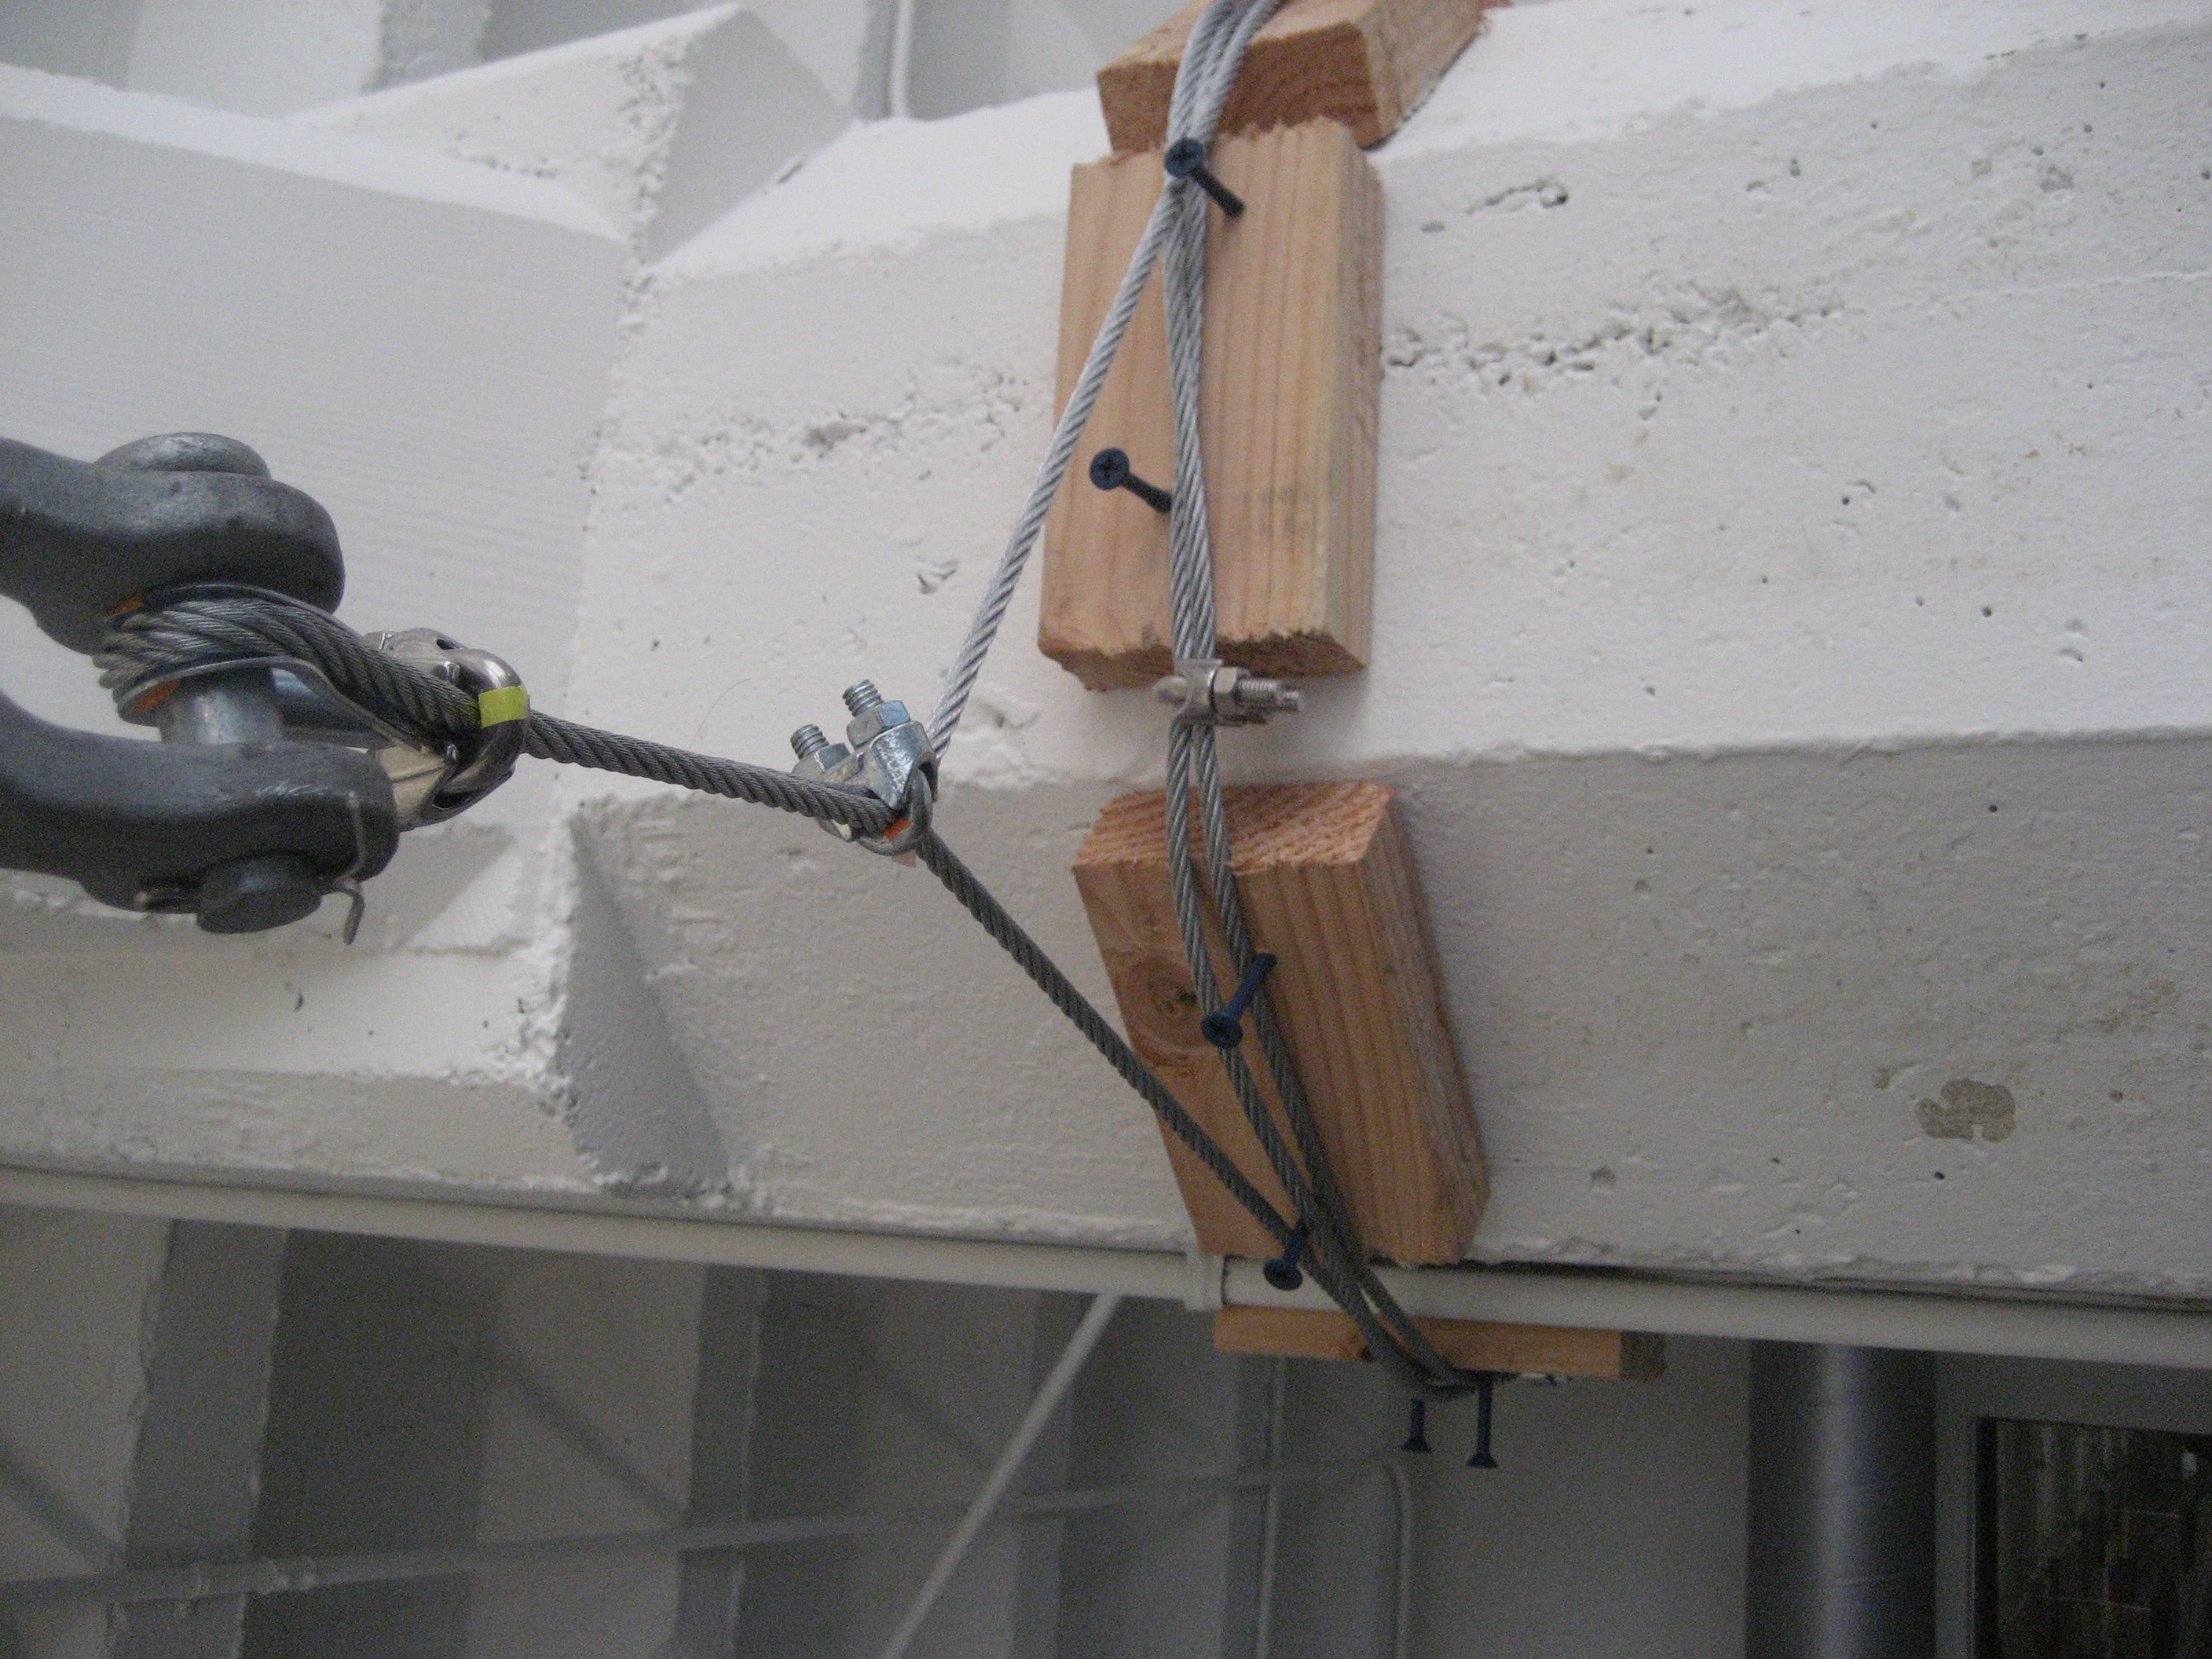
We cut four pieces of cable: 1 to go around the originating column and anchor one turnbuckle, the main zip line, and two each to go around the terminating columns and anchor to the other turnbuckle. The turnbuckles together gave us the ability to take up about 2 feet of slack, though turning them gets very difficult as the rope gets tighter. We attached the two turnbuckles to the start and end of zip line respectively, attached the main zip line to turnbuckle at the beginning pillar, then enlisted coworkers to help us pull on the main line near the turnbuckle at the end to put the rope thimble.


The three cables securing the turnbuckles to the columns have two loops around the wood blocks held in place by 3 wire clips each. They are attached to the turnbuckles with a ¼ inch steel rope thimble with a wire clip right at its end to hold the thimble in place. These are the two biggest issues with the construction: first, the head anchor cable has two wire clips, one of which pinches the cable together and should be removed — it’s both unnecessary and under a lot of pressure. Second, the rope thimbles we purchased are not strong enough to withstand the amount of pressure we put on them — one of them crumpled and the others are on their way to crumpling.

There are six columns spaced 14 feet apart, so the zip line runs 70 feet less four feet for the two turnbuckles. At the beginning the zip line is 9.5 feet high, and 7 feet high at the end. Thus the line drops 2.5 vertical feet over 66 horizontal feet. This turns out to be nowhere near enough. We had actually thought at the beginning that the combination of the pulleys in the Petzl trolley and the galvanized steel cable would be so slick that people would just fly down the zip line. While the zip line is really fun, people often need to be pushed because the line bows locally under their weight. Version 2.0 will fall about 5 vertical feet over a run that is shorter by one set of columns. This gives us a slope of 5/52 = 0.096 for version 2 instead of a slope of 2.5/66 = 0.038, which will leave us with roughly 2.5 times the slope.
You should expect that you will have to tighten the main line and shorten it a couple of times. Chris Seifert has brass balls and took the very first ride down the zip line, which ended up pulling on the various cables far harder than we were able to before and creating a couple feet of slack, even after we had tightened both turnbuckles as far as we could using three people and an enormous wrench. We had to take the main line down and relocate one of the thimbles up the line, then put it back up.
Lessons:
- the wood blocks were a great idea – the cable really sunk into them and prevented crumbling the concrete. For a permanent installation we still should probably anchor the wood blocks in a permanent fashion and not just rely on the tension in the cable to hold them in place.
- 2.5 feet of vertical drop over about 145 – 4 feet for the turnbuckles equals 2.5/64 equals no where near* enough vertical distance for a fun zip line
- ¼ inch rope thimbles do not hold up under as much pressure as we put on them.
- the dual trolley doesn’t work particularly well — instead of the pulleys turning, it seems to mostly slide down the cable and gets very hot. This may be because we ended up using quarter inch cable while the trolley is designed for 3/8 inch rope/cable, or the pulley wheels might not be lubricated well enough, or perhaps there is some other issue.
- Overbuild the line — the first time you let people ride it, someone will inevitably attempt to ride down the line with two people.
- zip lines are fun as hell
- it’s really scary the first time someone rides the line when you’re hoping nothing breaks and nobody gets hurt
- Crappy ikea clippers don’t even begin to cut galvanized steel cable — you wreck the clippers and barely even dent the cable. Go to Lowe’s and buy a real cable cutter for $20.
Equipment:
- 250 ft of ¼ inch galvanized steel cable
- 24 ¼ inch galvanized steel cable clips
- 4 ¼ inch steel rope thimbles
- 2 enormous steel turnbuckles
- 24 feet of 2 by four, cut into 6 inch pieces
- 100 KwikTap ¼ inch by 2 and ¾ inch flat head concrete screws
- steel cable cutter
- petzl tandem steel pulley
- ¼ inch steel biner to attach the hand-hold to the pully
If you have any questions, feel free to email and I’ll try to answer them.
NB: according to the outdoor fun store, ¼ inch stainless steel galvanized cable breaks at 7K pounds and has a safe load limit of 1.4K pounds.
Links:
- Brian built what looks like an awesome zip line in his yard
- Make has an article on building a backyard zip line
- Though we ended up ordering parts from Amazon and getting the rest at Lowe’s, the zip line gear company looks like they have everything you’d need to build your own
- These folks discuss building a brake for a zip line